How To Add A HTML Signature To Apple Mail
Learn how to add a HTML email signature in Apple Mail that displays consistently across all devices and elevates your email communications.

First, create a HTML signature for Apple Mail using HubSpot’s Email Signature Generator, trusted by thousands of professionals. Then, follow the instructions below to configure your HTML signature on Apple Mail.
1. Open the Apple Mail settings: Launch Apple Mail → Click "Mail" menu → Select "Settings" (or Preferences in older versions)
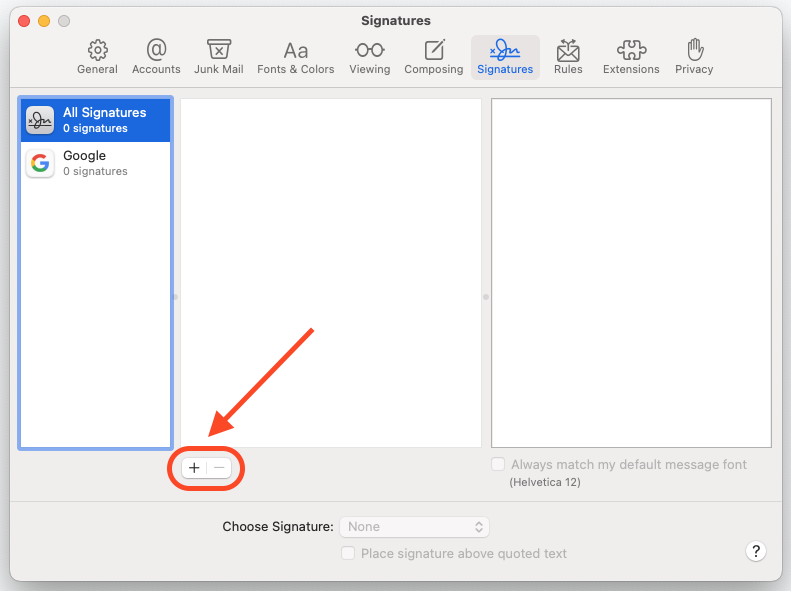
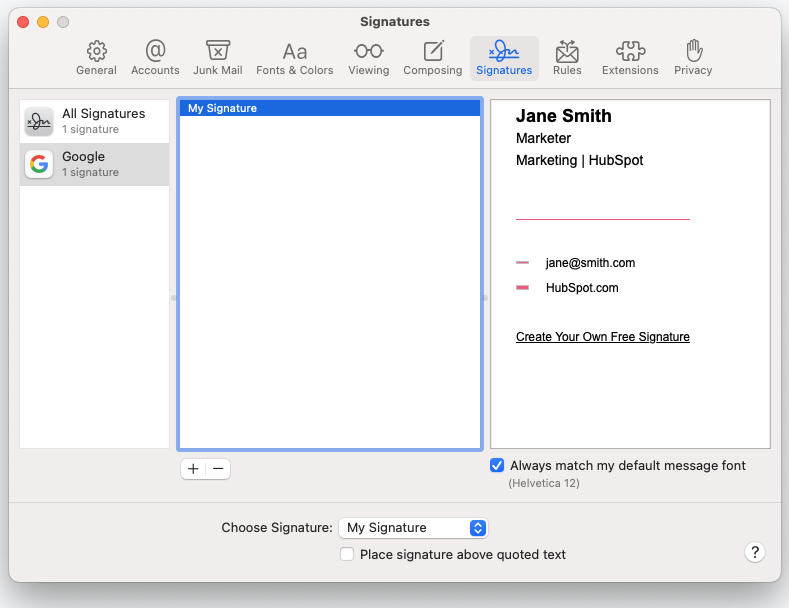
2. Navigate to the "Signatures" tab: Click the "+" button to create a new signature
3. Configure a placeholder signature:
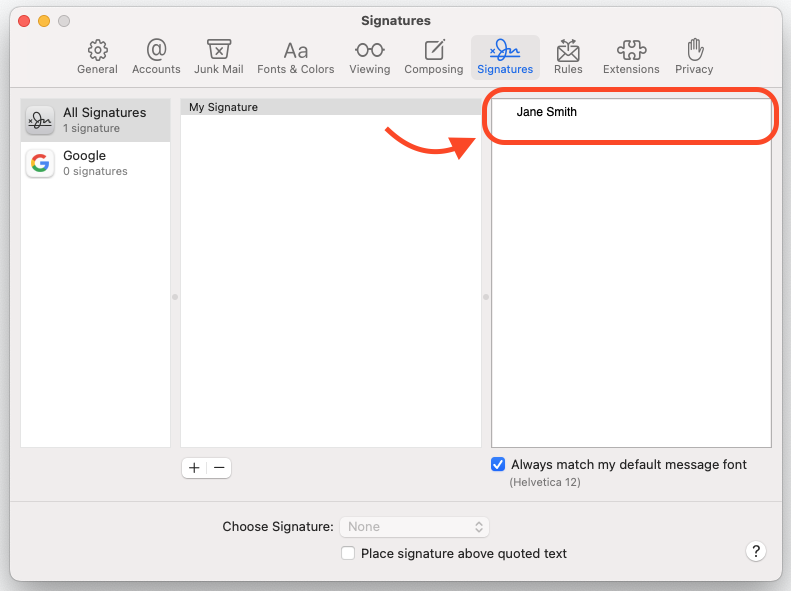
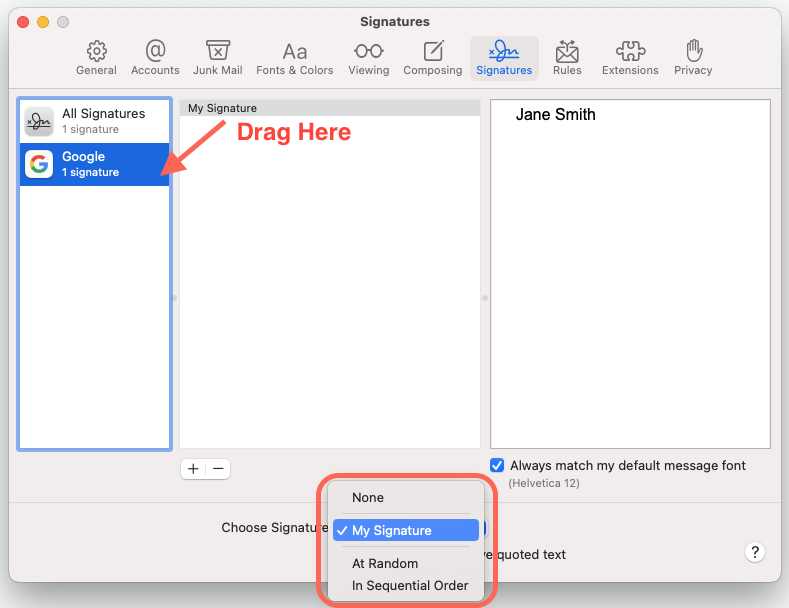
4. Apply your signature: Drag your signature to the desired email account in left column and set as the default under "Choose Signature" dropdown
5. Save and exit Apple Mail: Close the Settings window and quit Apple Mail completely (CMD+Q). This action saves your signature file to the system library
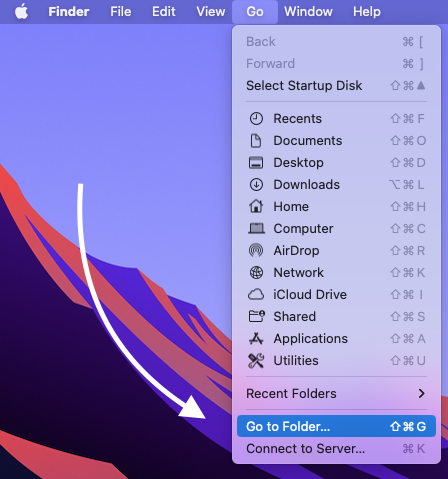
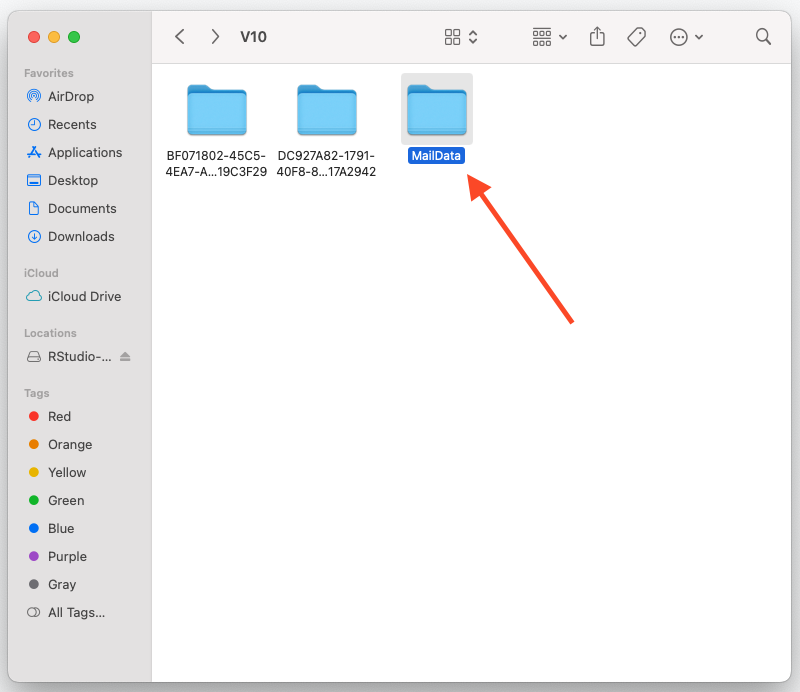
6. Access the Mail library: Open Finder, then click Go → Go to Folder
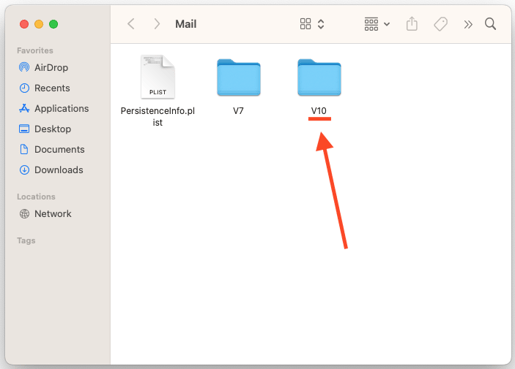
7. Navigate to the signatures folder: Type “~/Library/Mail” and click the “Go” button.
8. Locate the latest version folder: Open the folder starting with "V" followed by highest number (e.g., V10, V11)
9. Enter the "MailData" folder
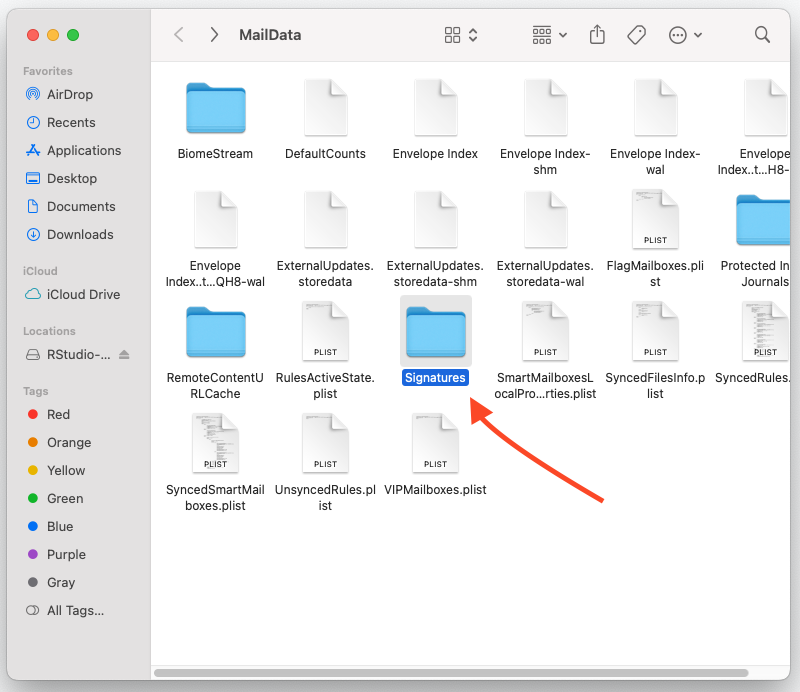
10. Open the "Signatures" folder
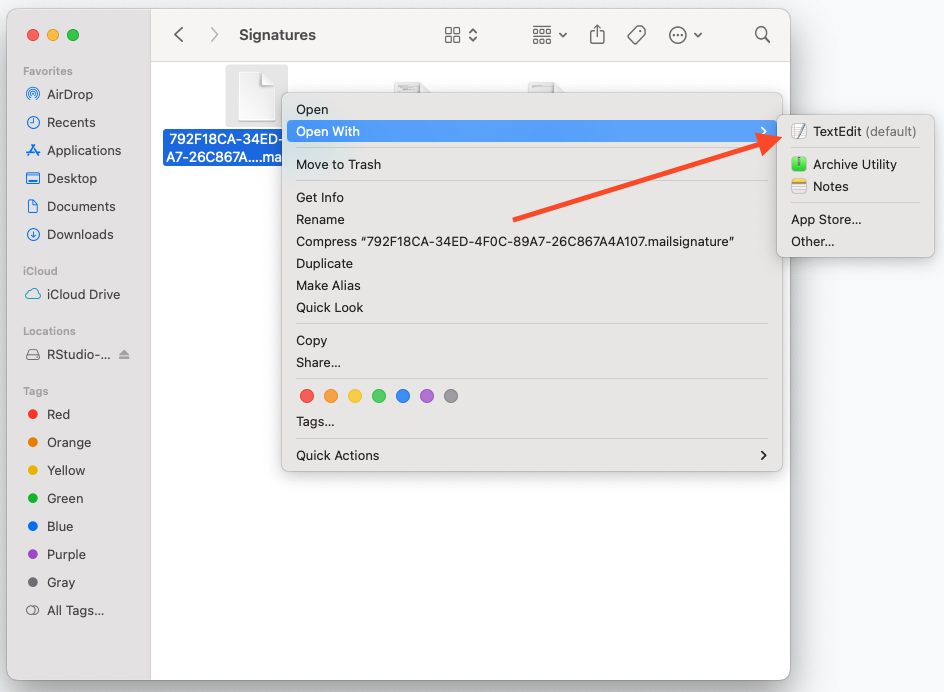
11. Identify your signature file: Sort by "Date Modified" to see the newest files and look for the file ending in .mailsignature
12. Edit the signature file: Right-click the .mailsignature file and select "Open With" → "TextEdit"
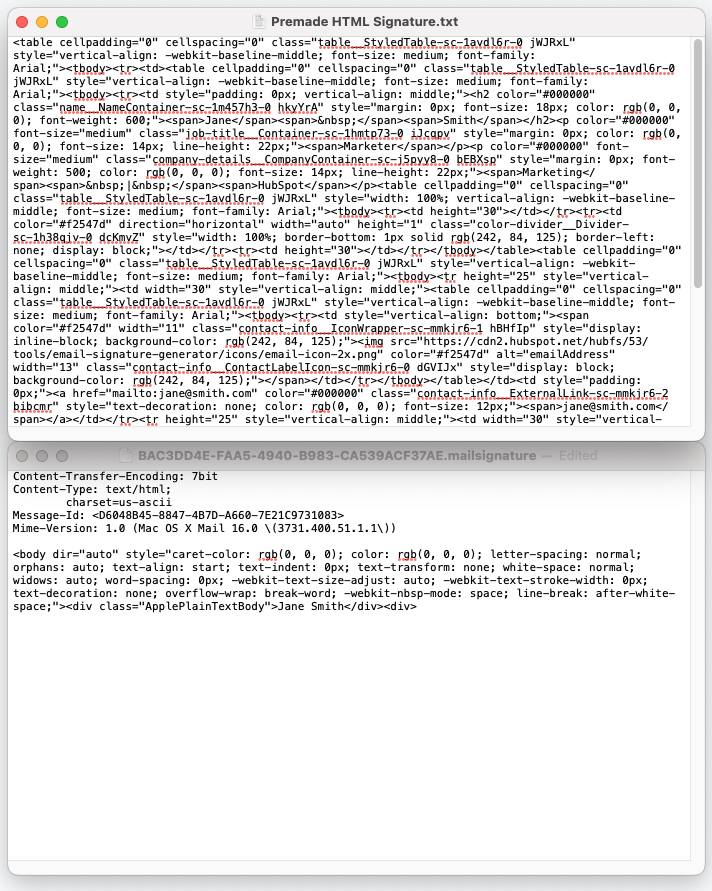
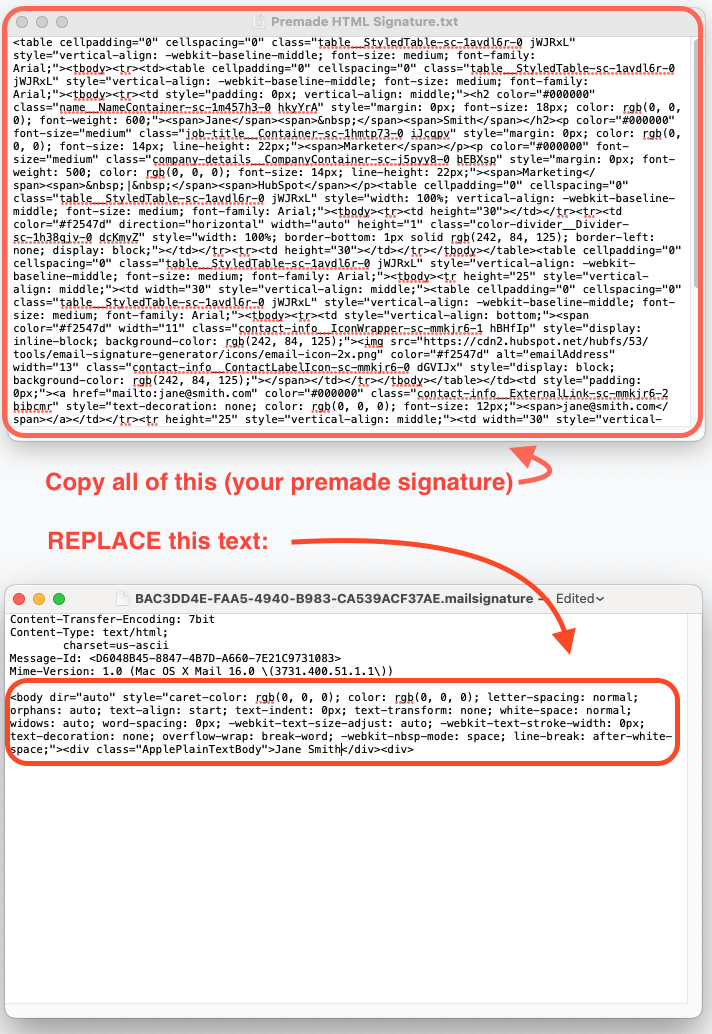
13. Insert HTML signature: Open your HTML signature code in a separate TextEdit window.
14. Replace body content: In the .mailsignature file, locate the <body> tag and select everything from <body> to </body> to replace with your HTML signature code.
Critical: Preserve all content above <body> tag
15. Confirm changes: After replacing the text, your signature should look like this.

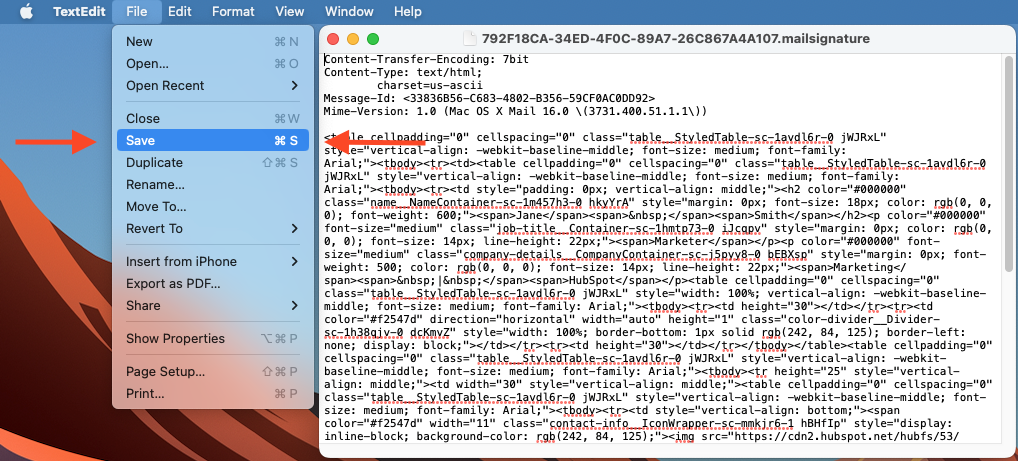
16. Save the file: Use CMD+S to save.
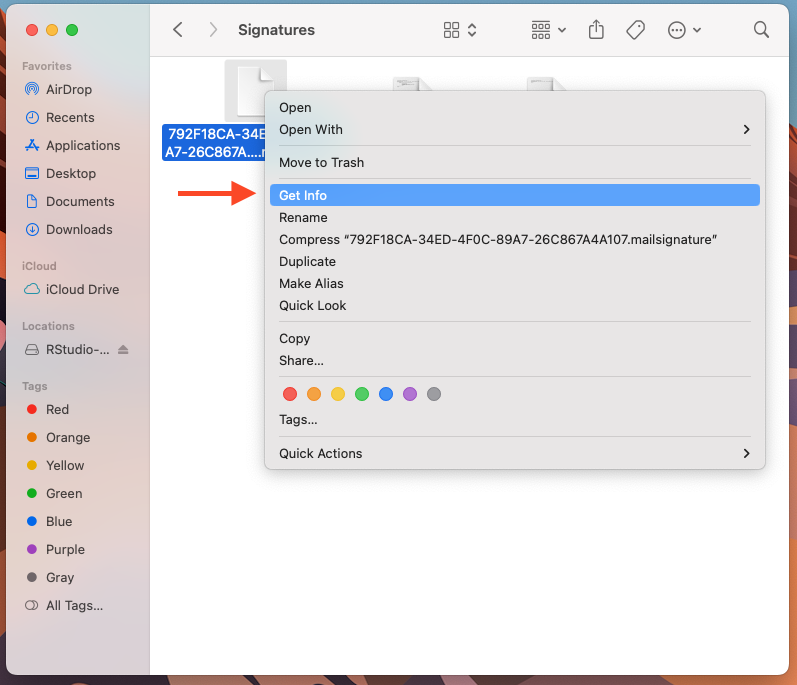
17. Lock the file: Right-click your signature file → "Get Info"
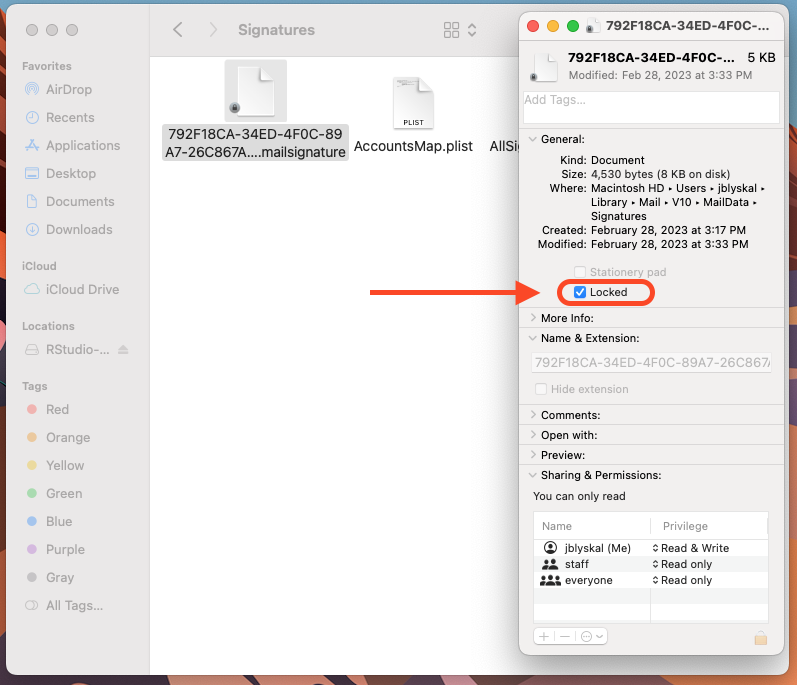
18. Check the “Locked" checkbox: This prevents Apple Mail from overwriting your HTML
19. Verify results: Open Apple Mail and navigate back to Signatures to verify the signature looks the way you want.

HubSpot's Apple Mail Signature Generator creates Apple Mail-optimized HTML signatures in under 5 minutes, eliminating manual coding while ensuring cross-platform compatibility. Unlike generic generators, it produces clean HTML specifically formatted for Apple Mail's rendering engine. Try this Mac Mail HTML signature generator trusted by thousands of professionals today.