How to Create A Rule in Outlook
Learn email automation in Outlook by creating intelligent Microsoft Outlook rules that automatically organize, categorize, and manage your messages. Reduce inbox clutter and clog in minutes.

Directly setting up rules in Outlook provides the most comprehensive control over email automation. This method enables complex multi-condition rules that can evaluate message properties including sender domains, subject keywords, message importance levels, and custom categories simultaneously.
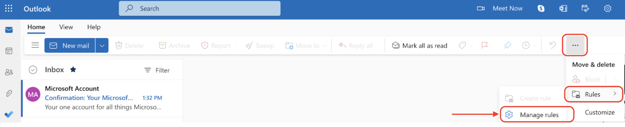
1. Click the Settings gear icon (⚙️) in your Outlook account or navigate to File > Manage Rules & Alerts. Select "Rules" then "Manage rules" to open the comprehensive rules dashboard.
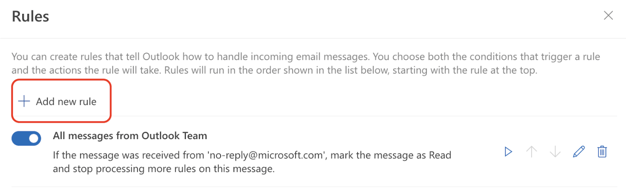
2. Click "+ Add new rule" to initiate Outlook rules setup.
3. Name your rule clearly - Use descriptive names like "Weekly Reports to Analytics Folder" rather than generic "Rule 1".

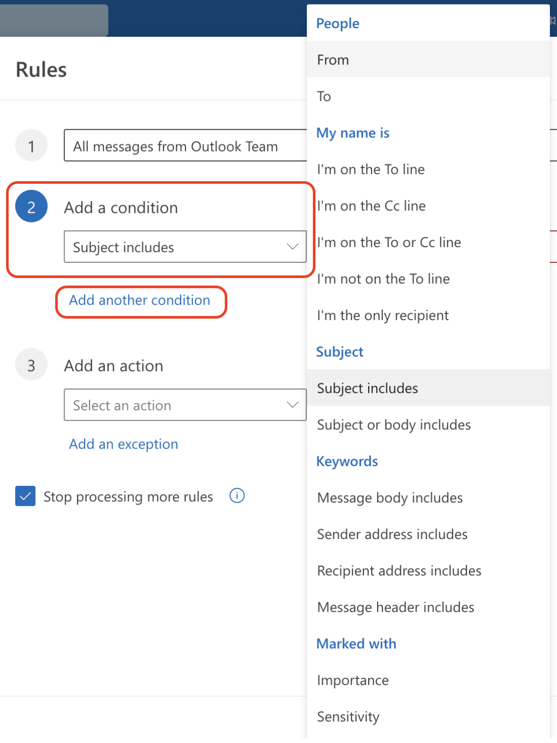
4. Define conditions using the dropdown selector. Examples of conditions include:
5. Set actions from categorized options:
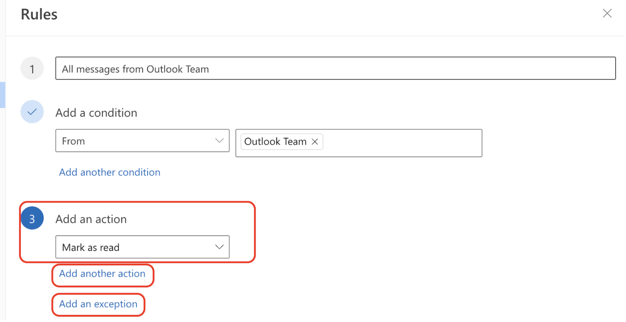
6. (Optional) Add exceptions to prevent over-filtering important messages.
7. (Optional) Enable "Run rule now" to process existing inbox messages retroactively.
8. Click 'Save' to activate your rule immediately.
Creating rules in Outlook directly from messages captures exact sender addresses and subject patterns automatically, eliminating manual entry errors and ensuring precise targeting.
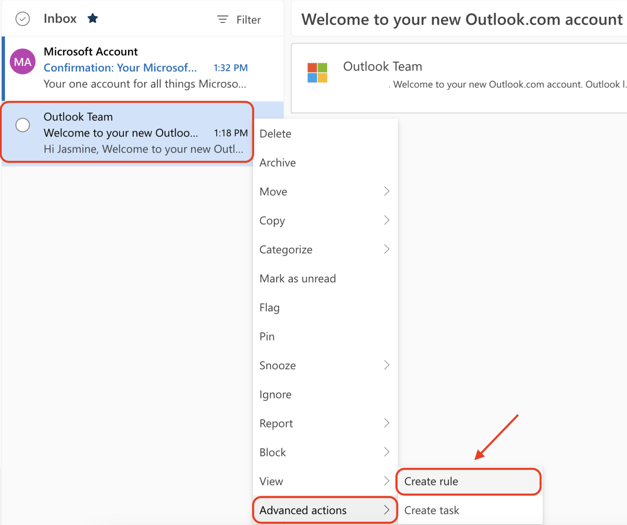
1. Right-click any email in your inbox or folder.
2. Select "Advanced actions" > "Create rule" from the context menu.
3. Choose immediate action or "More options" for advanced configuration.
4. Name your rule descriptively (auto-populated with sender name).
5. Refine conditions beyond the pre-filled sender. Add subject line keywords, include message type filters, and specify time ranges or date conditions.
6. Stack multiple actions. For example, you can create a rule to: Move to folder AND mark as read.
7. Test with "Run rule now" on existing messages
8. Enable "Stop processing more rules" to prevent conflicts with other automation
Alternative access method: Open any email and click the three dots (...) menu > "Advanced actions" > "Create rule" for identical functionality with larger screen space.

Now that you've learned how to set up a rule in Outlook, customize your Outlook further with a professional email signature from HubSpot’s Email Signature Generator. Choose from quick, user-friendly templates that allow you to create Outlook email signatures within 5 minutes.