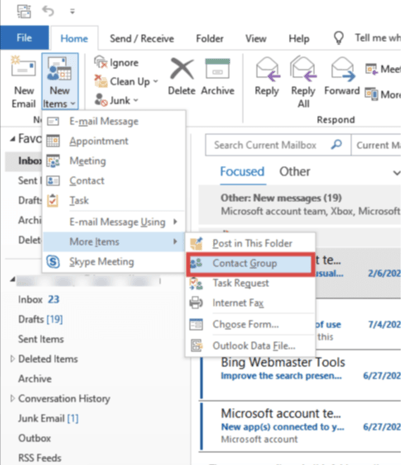
How To Create A Distribution List In Outlook
Learn how to create an email distribution list in Outlook to save time daily when messaging teams, departments, or recurring groups. This tutorial will walk you through creating a mailing list in Outlook 365, Windows, and Mac.