How to Organize Outlook Email Folders
Achieve complete Outlook organization with folders, categories, and Outlook organization tips that transform inbox chaos into streamlined productivity.

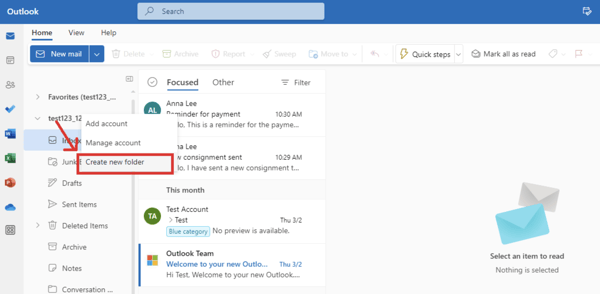
1. Right-click your email account name in the navigation pane.
2. Select "Create new folder" from the context menu.
3. Enter a strategic folder name using consistent conventions:
4. Choose the parent location (Inbox, custom folder, or root level).
5. Click "Save" to instantly create the folder.
Creating a folder in Outlook works similarly in both Desktop and Web, with one key initial difference in navigation:
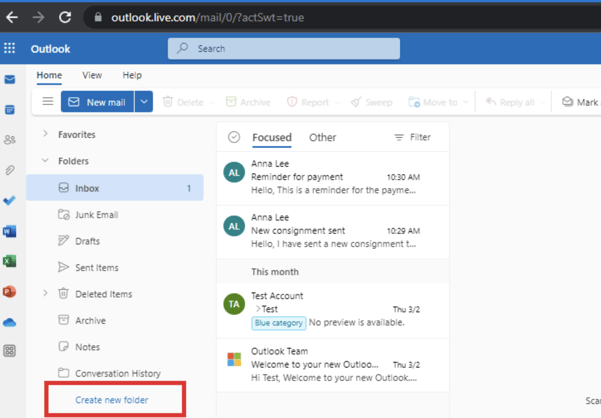
1. Navigate to the folder pane on the left sidebar.
2. Click "Create new folder" at the bottom of your folder list.
3. Type your folder name following naming best practices.
4. Press Enter to create the folder immediately.
Now that you have learned how to make a folder in Outlook, take your inbox folder organization further with Outlook categories. Categories provide visual organization within folders, enabling color coding systems that improve email scanning speed. Categories also allow you to add metadata tags to further organize Outlook folders.
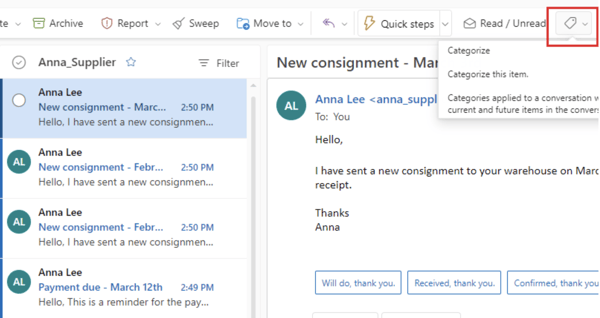
1. Select any email in your folder. Click the "Categorize" icon in the toolbar.
2. Choose "New category" to create custom labels. 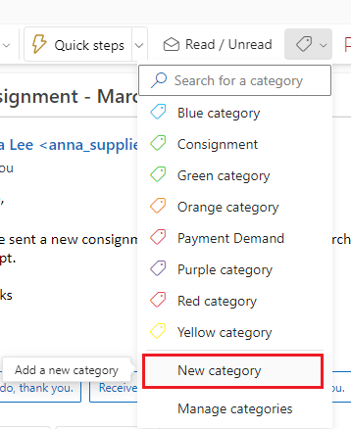
3. Name the category (e.g., "Urgent", "Pending Review"). and select from 25 available colors.
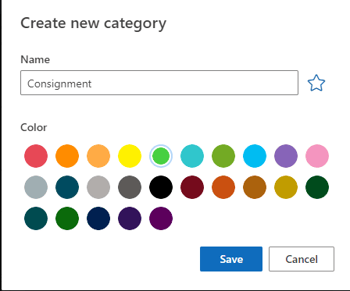
4. Click "Save" to create the category.
How to Rename Categories in Outlook:
Select the category from the master list, then click "Rename" or press F2. Enter the new name, which automatically updates across all tagged emails while maintaining color assignments and email associations.
How to Change Color Categories in Outlook:
Select your target category and click the color dropdown arrow. Choose from 25 color options or "No Color"– the change will apply retroactively to all emails using that category.
How to Delete Categories in Outlook:
To remove a category, select it and click "Delete." This confirms removal from all associated emails and cannot be undone. For that reason, consider archiving important categories instead of deleting them.
Moving emails to designated Outlook email folders can be accomplished manually or automatically. Outlook provides multiple methods to organize existing and incoming emails efficiently. Learn how to direct emails to a folder in Outlook below.
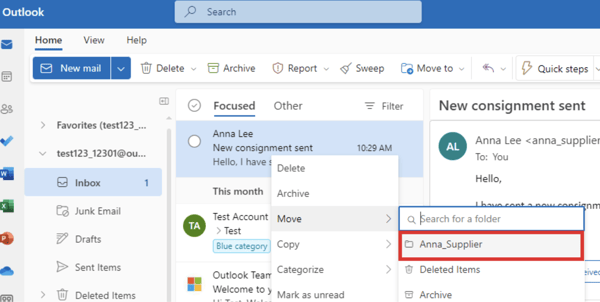
1. Right-click the target email in your inbox and select "Move" from the menu.
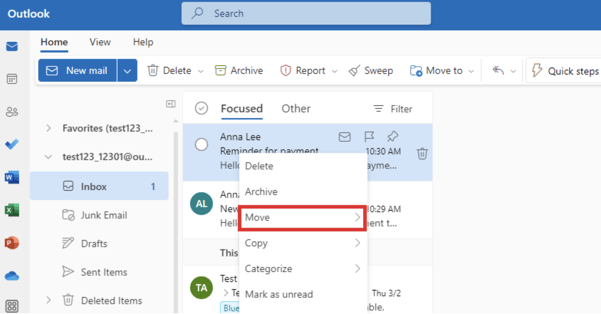
2. Choose the destination folder or use the search box. Click to move the email immediately.
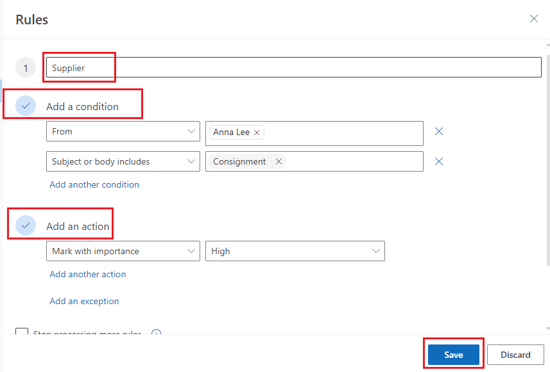
1. Click the three-dot menu on any email.
2. Select "Rules" > "Manage rules" > "+ Add new rule".
3. Define your conditions (sender, subject keywords, attachments) and set actions (move to folder, mark importance, categorize)
4. Name and save the rule for automatic application
Professional email organization requires strategic implementation of folders, categories, and rules to manage the hundreds of weekly work emails efficiently. The following workplace-specific strategies will transform your Outlook into a productivity powerhouse that supports both individual and team workflows.
How to Use Categories in Outlook for Work:
Using categories in Outlook in a work environment serve as visual productivity indicators that is the best way to organize emails in Outlook. Implement an action-based category system using color psychology to drive task completion. Red categories signal urgent items requiring response within two hours. Orange indicates tasks for completion by end of day. Yellow marks items needing attention within the week. Green shows completed tasks ready for archiving.
Beyond action-based categories, create department alignment categories that match your organizational chart's color scheme. This visual consistency helps quickly identify email sources and facilitates workload analysis across departments. When finance uses navy blue, marketing uses teal, and operations uses forest green, you can instantly assess your communication balance and identify potential bottlenecks.
How to Make Folders in Outlook for Work:
Creating a Outlook folder structure for work requires thinking beyond simple categorization. Your folder system should mirror your organization's hierarchy while accommodating project-based workflows. Start by making folders in Outlook for each major area of responsibility. For management roles, this might include folders for Meeting Notes, Strategic Planning, Reports, and Team Communications. Marketing teams typically need folders for Campaigns, Content Calendar, Analytics, and Brand Assets.
The key to successful organization of your Microsoft Outlook folders lies in creating a scalable system that grows with your responsibilities. When you set up folders in Outlook, use a consistent naming convention that includes the year, project code, and client name, such as "2026-ProjectAlpha-TechCorp." This approach ensures that folders sort chronologically and remain searchable even years later.
Key Tip: Now that you have learned how to create folders in Outlook email and organize your inbox, create a professional email signature to match.